The SpotMeGirl’s Definitive Guide to Foam Roller Exercises
Girls, let’s be honest. How many of us have hit up Amazon for a foam roller only to let it fall by the wayside a week later? We’ll be real with you, we have too. After promising to give our muscles all the self-rolling love they deserve, we quickly forgot about our magic purchase. It felt too, you know, confusing. What foam rolling exercises were we supposed to do?
If you’re nodding in agreement, keep reading because you’re about to find out. We’ve created this definitive guide to foam roller exercises to soothe your screaming fibers, girl. We’re here to get you looser and pain-free one roll at a time. Here goes…
Article preview:
- Benefits of using foam rollers
- Foam roller exercises for your back
- Foam roller exercises for your legs
- Foam roller exercises for your arms
- Final roll – Five minutes to perfect foam rolling
Benefits of using foam rollers
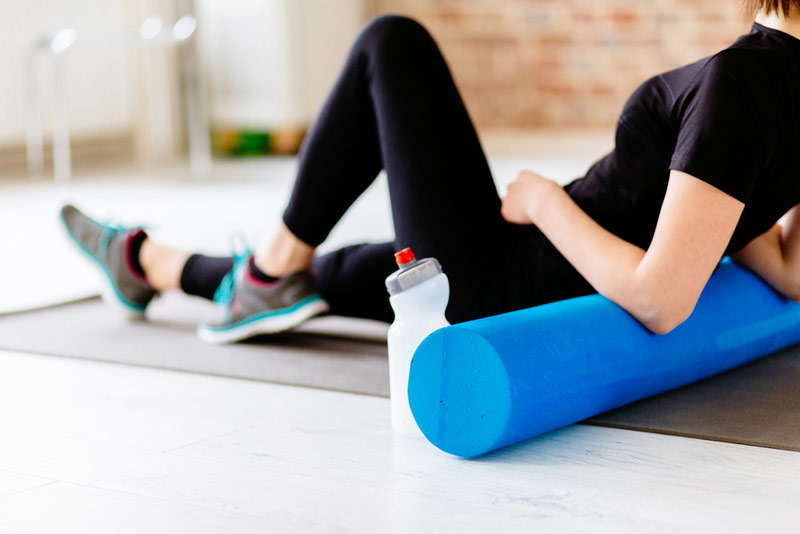
There’s more to foam rolling than a chance to kickback, get down to eye level with your pets and catch up with that latest Netflix obsession. Foam rolling is a proven way to support your efforts in the gym by optimizing both your workout prep and recovery. Yup, it’s all the things they said and more.
Foam rolling is simply a form of self-massage. So, rather than drop the cash on a masseuse or sports therapist, we grab one of these spongy tubes and get rolling. By applying pressure via our bodyweight to certain muscles we release tension, making us feel primed and looser.
Studies have shown that foam rolling can significantly decrease soreness up to 72 hours after an intense workout [1]. Yeah, that right girl, it’s a surefire way to combat leg day DOMS. So, if you’re the sort of girl who likes to go in hard on her HIIT sessions, foam rolling could be for you.
It’s not just all about recovery though. As much as we’re all for feeling better after crushing it in the squat rack, we get just as excited about upping our gym game. You do too? Well, you’ll be happy to know foam rolling is also an awesome method for activating muscles as part of pre-workout warmup.
Essentially, you’ll be readying your body for the hard work it’s about to endure. However, you’ll be able to do so without a reduction in power often associated with certain types of stretching [2]. Add in an improved range of motion and localization of blood in the muscles, and you’re ready for anything a workout could throw at you.
Choosing a foam roller
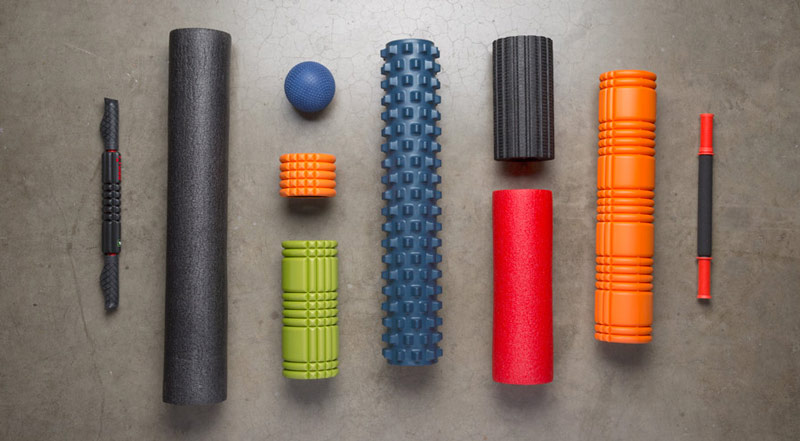
Just like all workout gear, it’s good to get to grips with what you’re purchasing. No one wants to drop hard-earned cash on the wrong thing – no matter if it’s a new sports bra, pair of shiny weightlifting shoes or even a booty-building supplement.
So, when fetching yourself a foam roller (okay, ordering online) consider your experience level. If you’re a newbie to rolling or massages in general, go for a softer version. The foam in these guys are a lot more forgiving, meaning they’re perfect for helping you get started. You’re also less likely to get injured whilst perfecting your rolling technique.
Yet, if you’re at one with soft-tissue rolling or receive a sports massage on the regular, go for firmer foam. Whilst they might not be as forgiving as a softer roller, they’re better for girls who want to go in deeper, especially if you decide on a more aggressive surface.
SpotMeGirl advise you also lock eyes on a longer roller, which are typically around 36-inches. Shorter rollers are seriously for stashing in a gym bag but they’re not always great for working larger areas. At least with a longer tube you’ll have something at hand to hit any body part.
Foam roller exercises for your back
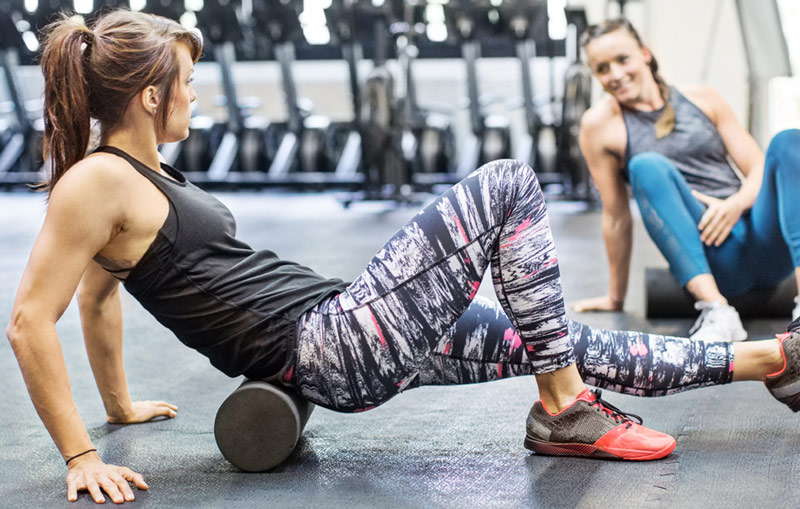
Lower back roll (Lumbar spine)
How to do it:
- Set yourself on the floor in a seated position with your knees bent and feet out in front
- Place one hand behind you flat on the floor with a straight arm to support your weight, whilst grabbing your foam roller with your other hand and placing it under your lower back
- Next, put your free hand on the floor in line with the other and let the roller support your bodyweight. You can do this by raising your hips away from the ground whilst simultaneously leaning back
- Cross your arms across your chest whilst protracting the shoulders before rolling up and down the roller. Ensure you’re not rolling on the spine, but on the muscles either side of it
Tip: Roll both sides even if one doesn’t feel too tight. This will help you combat muscular imbalances, leaving you injury free in the future
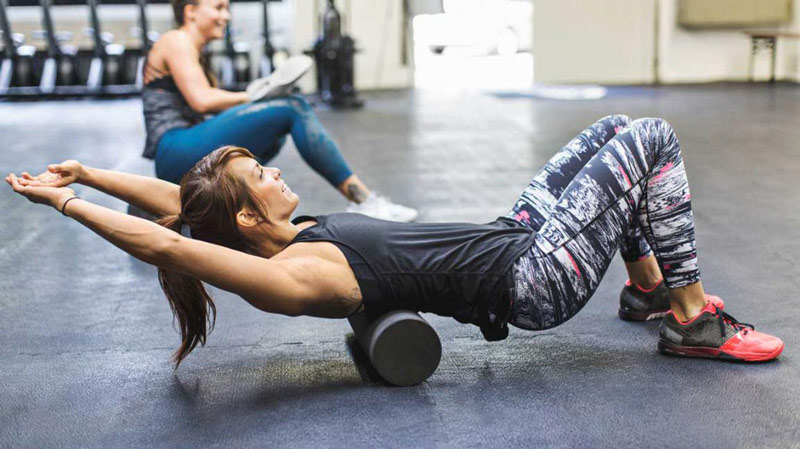
Upper back roll (Thoracic spine)
How to do it:
- Set yourself on the floor in a seated position with your knees bent and feet out in front
- Place one hand behind you flat on the floor with a straight arm to support your weight, whilst grabbing your foam roller with your other hand and placing it under your upper back
- Again, just like with the lower back, cross your arms across your chest whilst protracting the shoulders
- Lift your hips from the ground and let the foam roller support your body weight
- Brace the core to keep the back straight and slowly roll up and down the roller
Tip: Keep looking up towards the ceiling when rolling to keep your neck in a neutral position. It’s very tempting to look down towards your knees, but this can put extra stress on your spine
Foam roller exercises for your legs
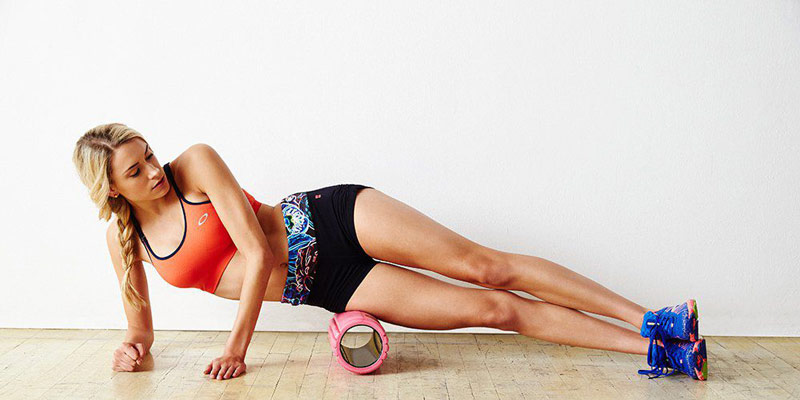
IT Band Roll
How to do it:
- Lay comfortably on your side with your bottom leg set on the foam roller – aim to position the roller somewhere between your knee and hip
- Cross your opposite leg over the top, bend your knee, and place your foot flat on the floor. This leg will help support your body weight, so you can control how much is placed on the roller
- Now, use your arms and free leg to determine how much weight is applied to the roller. If you’re seriously tight, consider making yourself lighter to relieve the pressure
- Roll your leg up and down the roller without going over the knee or hip joint
Tip: IT bands are notoriously tough and tender spots to hit. If you feel discomfort too much, try rolling a smaller area and applying less pressure. You can also roll for shorter time periods before taking a mini break -trust us, you’ll get there, girl
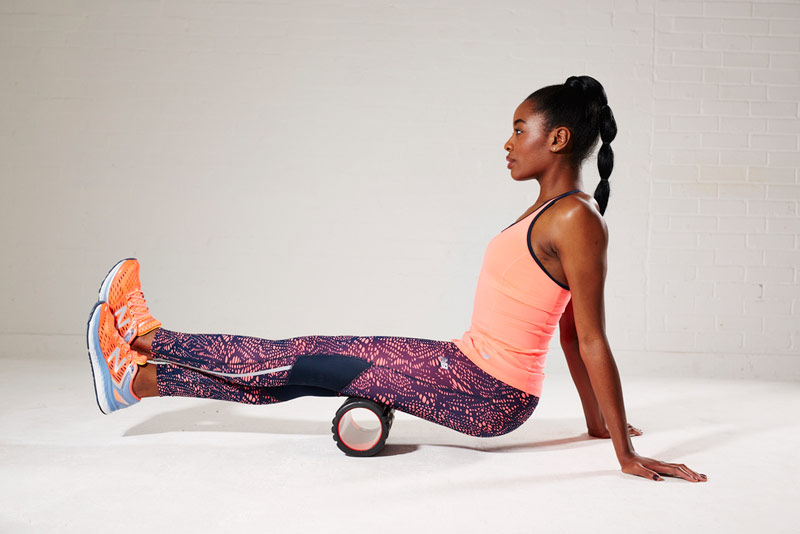
Hamstrings roll
How to do it:
- Set yourself in a seated position with one knee bent, the opposite hamstring on top of a foam roller, and your hands on the floor behind you for support
- Push through the hands to elevate your hips so your bodyweight is now loaded onto the foam roller
- Roll the hamstring back and forth over the roller. Look to start just underneath he hip and stop just above the tendons of your knee joint
- Repeat on the other leg
Tip: Relax your hammies when rolling them to maximize the massaging effect. After all, tight muscles aren’t good for anybody. So sit back, chill and allow the foam roller to get to work
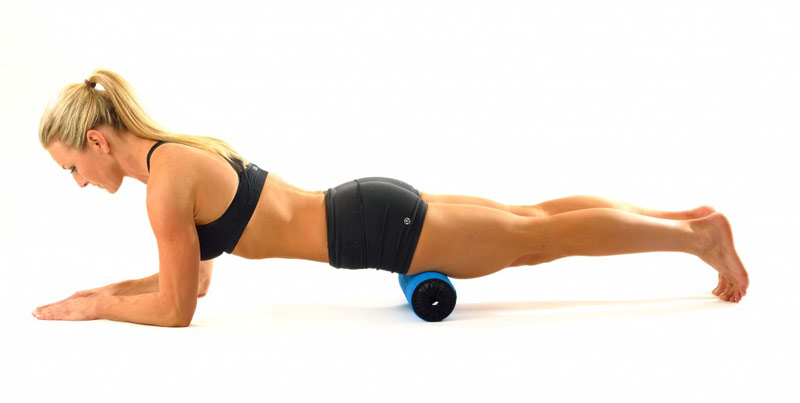
Quadriceps roll
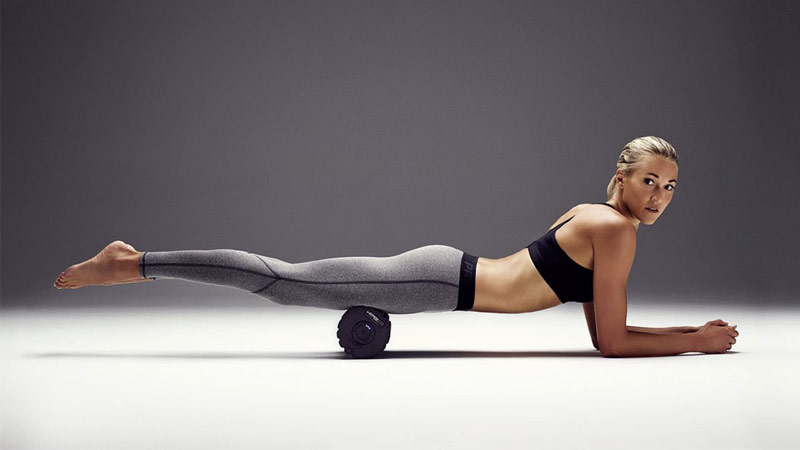
- Okay, this one’s a little trickier than the roll for our hammies. Start off by lying face down with your body weight supported by your forearms. Think about hitting a plank and you’re set to go
- Grab your foam roller and slot it under the top front-side of one leg. You’ll be looking to roll this leg so don’t let it touch the floor
- Using your forearms and opposite leg, apply as much weight onto the roller as you can handle without being too uncomfortable
- Roll your leg up and down the foam roller without going past the knee or hip joint
- Repeat on the other leg
Tip: Although it’s awesome to relax those quads here, you should still brace your core. Doing so will help keep your spine in alignment and won’t put stress on your lower back.
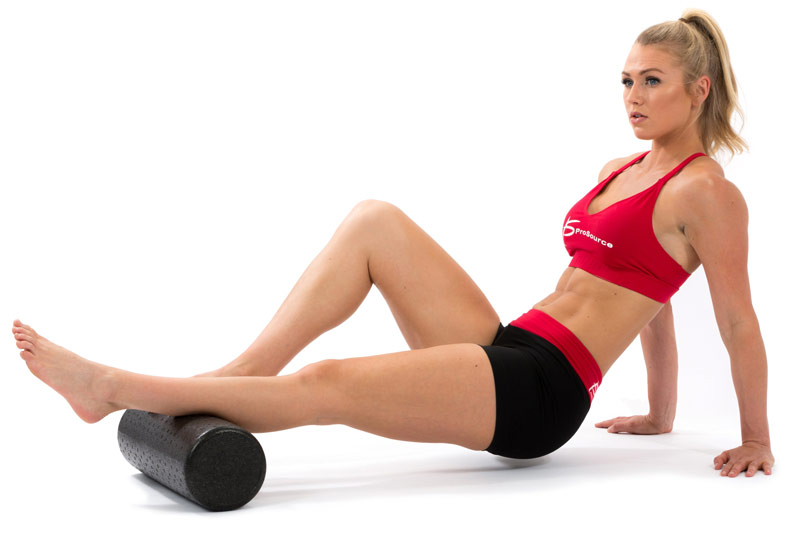
Calves roll
How to do it:
- You guessed it girl, we’re starting in a seated position. Sit comfortably with your hands behind you, arms straight, and with your calves resting on the foam roller
- Push through your palms to raise your booty off the ground – at this point your body weight should be distributed between the roller and your hands
- Roll back and forth covering the space between below the knee and above your ankles
Tip: If you’re not feeling like the foam roller is digging deep enough go one calf at a time. Placing one leg on the top of the other in a crossed position adds extra pressure to the muscle, meaning you’re more likely to hit the spot
Foam roller exercises for your arms
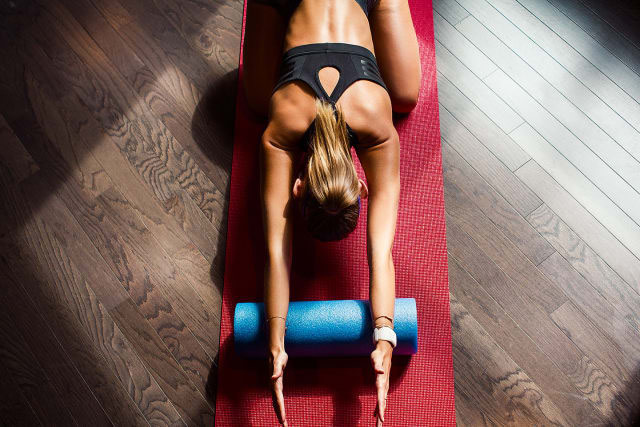
Forearm roll
How to do it:
- Kneel with a foam roller set in front of you, sit back onto your heels, and place your forearms on top of the roller – your pinky finger should be facing the floor and your thumb towards the ceiling
- Place as much body weight onto the roller as you can
- Next, extend at the knees and hips to roll your forearms up and down the foam roller – only roll the space between the wrist and just below your elbow
Tip: Change the angle of attack by rotating your forearms inwards and outwards. This way you’ll really hit the spot, girl!
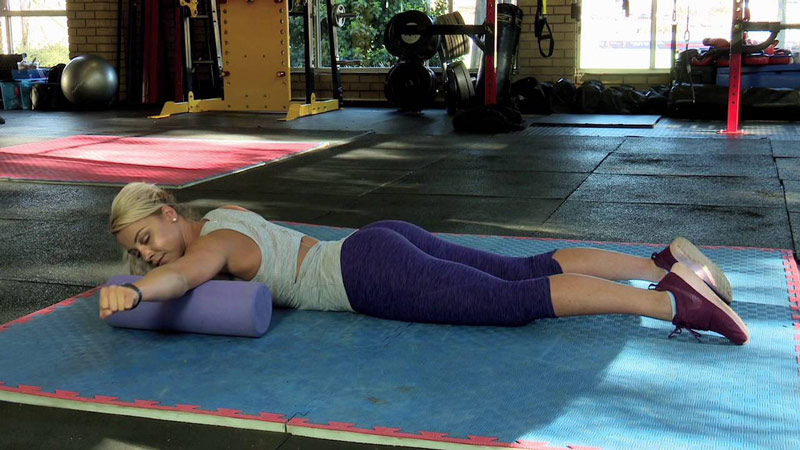
Biceps and triceps roll
How to do it:
- Lay on your side with one arm in front and the other straight out in line with your shoulder – place a foam roller under this arm
- Using the hand that is on the floor, raise your upper body so that the weight is partially on the roller
- Apply as much pressure as necessary and slowly roll back and forth – aim to travel from just below the shoulder joint to slightly above the elbow
- Rotate your arm whilst rolling to hit different spots on both the biceps and triceps
Tip: Once you find a real tender spot hand around there whilst flexing the wrist and fingers. This active range of motion will increase ROM at the joint
Final roll – Five minutes to perfect foam rolling
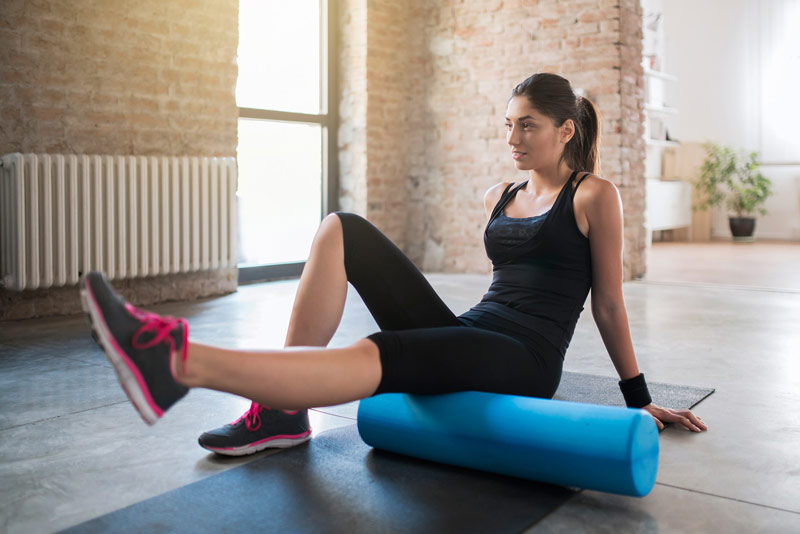
Rolling for recovery? Spend two to five minutes on each muscle to allow enough time for it to relax. Really focus on tight areas by rolling slowly and listening in with your body.
Once you find a tight spot, steadily apply pressure until you feel the area release. We’re not gonna lie girls, it can sometimes be a little sore. But, as always, persevering is always worth it. Expect to feel an acute feeling of tenderness before a noticeable relaxing sensation.
If you feel like an area needs special attention but it’s too sore to touch, work around it. Rather than dive right into one place try massaging an inch or two around it. Eventually, you’ll break down the tension from the outside in, until you finish up at the intended tight spot.
Rolling for activation? Get involved for 30 to 120 seconds on each major muscle until it (along with surrounding joints) feels loose. If you know you have certain trouble spots spend a little extra time on them until you’re 100 percent ready to go.
Good luck, girl Keep on rolling!
References
- Pearcey GE, et al. Foam rolling for delayed-onset muscle soreness and recovery of dynamic performance measures.J Athl Train. 2015
- MacDonald G, et al. An Acute Bout of Self-Myofascial Release Increases Range of Motion Without a Subsequent Decrease in Muscle Activation or Force.J Strength Cond Res. 2013
More articles handpicked for ladies who lift:
